

As part of my recent projects, I have started including OTA firmware updates for my ESP8266 devices. (Also known as FOTA)
Doing so is actually remarkably easy, thanks to the very good support for this exposed by the Arduino board support package. The hardest thing actually becomes getting the web server side set up, rather than the changes required on the device itself.
Firmware server
The firmware server can be any web server accessible over HTTP. (Or HTTPS, will get back to that later)

For my projects, I decided to create a folder containing the firmware images, and to give each image a name derived from the MAC address of the ESP8266 device it applies to. Along with each firmware image is a simple text file with a single line containing a build number/version number.
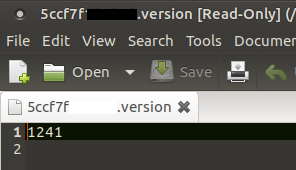
In my enviroment, I use a 32-bit integer to identify the build number. Not because I believe I will have to release more than 65,536 firmware versions, but because that gives me more flexibility in how I format the build numbers, for example by representing build dates directly in the number. However, for simplicity and the sake of this example, I’ll just put a plain version number in there.
The specifics of how you organise and name the firmware images is completely up to you, of course. For example, if you do larger production runs, you could use a device model number as the base for your firmware image naming convention instead.
Publishing firmware images
Add a version number constant variable to your sketch, outside of any functions. Every time you are ready to release, increase this version number by whatever convention you choose, for example a simple increase by one each time, or a more complex rule based on the current date and an increasing build number.
const int FW_VERSION = 1244;
Compile the sketch (Ctrl+R) and then export the binary. (Ctrl+Alt+S) Exporting the binary will generate an image file into the same folder your sketch is in. The actual name will depend on the particular board you are compiling for. For the Adafruit Huzzah ESP8266 breakout, the name is the same as your main .ino file, but with .adafruit.bin appended.

This file needs to be copied to the web server. How you do this depends on the type of web server you are using. I’m showing an example here, based on Apache2 running on the same computer I am using for compilation. Your paths may vary depending on your operating system and web server.
cp WifiTempMonitor.ino.adafruit.bin /var/www/html/fota/5ccf7fXXXXXX.bin
Next, after the firmware has been published, update the version number in the version file and publish that as well. This needs to be done after the firmware image, otherwise the wireless devices may see the updated version file and try to download a new firmware. If your new firmware is not ready on the server at that time, the devices may get either an old version or an incomplete file. An incomplete file could potentially brick your device…
Adding OTA support to the ESP8266 device
Start by adding #include statements for the OTA support library and the HTTP client library if you haven’t already included it.
#include <ESP8266HTTPClient.h>
#include <ESP8266httpUpdate.h>
Add a global constant variable for the current firmware version.
const int FW_VERSION = 1244;
Next, we’ll need to tell the device where to find firmware updates. We have both an image and a version file, organised by device MAC, so we’ll need to define a base URL that we can derive the actual URLs from.
const char* fwUrlBase = "http://192.168.0.1/fota/";
Exactly where in your code you add the firmware check and update is up to you. The only requirement is that for obvious reasons WiFi must be enabled and connected at the time. In my weather station devices I make the check after all measurements have been taken and uploaded to the server, just before the device goes back to deep sleep. We’ll define a function to check and update, and then just call it from a suitable location in your sketch.
We’ll build the URL to download the version number of the currently available firmware image. To get the device’s MAC address, call getMAC(), which will return it as a string of 12 hex digits.
void checkForUpdates() {
  String mac = getMAC();
  String fwURL = String( fwUrlBase );
  fwURL.concat( mac );
  String fwVersionURL = fwURL;
  fwVersionURL.concat( ".version" );

  Serial.println( "Checking for firmware updates." );
  Serial.print( "MAC address: " );
  Serial.println( mac );
  Serial.print( "Firmware version URL: " );
  Serial.println( fwVersionURL );
Download the version string and convert it to a 32-bit integer.
HTTPClient httpClient;
httpClient.begin( fwVersionURL );
int httpCode = httpClient.GET();
if( httpCode == 200 ) {
  String newFWVersion = httpClient.getString();

  Serial.print( "Current firmware version: " );
  Serial.println( FW_VERSION );
  Serial.print( "Available firmware version: " );
  Serial.println( newFWVersion );

  int newVersion = newFWVersion.toInt();
When connecting to a local firmware server, this check takes about 20 ms extra time and it uses a tiny bit of battery power. By itself, this is less than the background noise in the energy readings, so I would not be too concerned with additional power consumption caused by the firmware updates.
We compare the new firmware version number to the current version as defined in our global constant variable. If the version available on the server is newer than what we’re running on, build the URL to download the firmware image from and pass this to the OTA updater.
if( newVersion > FW_VERSION ) {
  Serial.println( "Preparing to update." );

  String fwImageURL = fwURL;
  fwImageURL.concat( ".bin" );

  t_httpUpdate_return ret = ESPhttpUpdate.update( fwImageURL );
The OTA updater downloads the image and writes it into the flash memory. If the OTA updater is successful it will never return as it will reboot the ESP8266. There could be reasons the updater will fail, so we have to be prepared to handle such failures. The usual cause for failure would be that the firmware image file could not be downloaded for some reason, or that the connection was lost while downloading. Such errors will not leave your device in an unusable state as the actual firmware flashing process would not have started yet.
  switch(ret) {
    case HTTP_UPDATE_FAILED:
      Serial.printf("HTTP_UPDATE_FAILED Error (%d): %s",  ESPhttpUpdate.getLastError(), ESPhttpUpdate.getLastErrorString().c_str());
      break;

   case HTTP_UPDATE_NO_UPDATES:
      Serial.println("HTTP_UPDATE_NO_UPDATES");
      break;
  }
}
The HTTP_UPDATE_NO_UPDATES case will not happen with the firmware server as described above. It is used with a firmware server that can compare the current version with the available one. I will get back to that later but you can remove those 3 lines from the code for now if you wish.
I’ll repeat the whole function here along with a little bit extra debug output for easy copy and paste.
void checkForUpdates() {
  String mac = getMAC();
  String fwURL = String( fwUrlBase );
  fwURL.concat( mac );
  String fwVersionURL = fwURL;
  fwVersionURL.concat( ".version" );

  Serial.println( "Checking for firmware updates." );
  Serial.print( "MAC address: " );
  Serial.println( mac );
  Serial.print( "Firmware version URL: " );
  Serial.println( fwVersionURL );

  HTTPClient httpClient;
  httpClient.begin( fwVersionURL );
  int httpCode = httpClient.GET();
  if( httpCode == 200 ) {
    String newFWVersion = httpClient.getString();

    Serial.print( "Current firmware version: " );
    Serial.println( FW_VERSION );
    Serial.print( "Available firmware version: " );
    Serial.println( newFWVersion );

    int newVersion = newFWVersion.toInt();

    if( newVersion > FW_VERSION ) {
      Serial.println( "Preparing to update" );

      String fwImageURL = fwURL;
      fwImageURL.concat( ".bin" );
      t_httpUpdate_return ret = ESPhttpUpdate.update( fwImageURL );

      switch(ret) {
        case HTTP_UPDATE_FAILED:
          Serial.printf("HTTP_UPDATE_FAILD Error (%d): %s", ESPhttpUpdate.getLastError(), ESPhttpUpdate.getLastErrorString().c_str());
          break;

        case HTTP_UPDATE_NO_UPDATES:
          Serial.println("HTTP_UPDATE_NO_UPDATES");
          break;
      }
    }
    else {
      Serial.println( "Already on latest version" );
    }
  }
  else {
    Serial.print( "Firmware version check failed, got HTTP response code " );
    Serial.println( httpCode );
  }
  httpClient.end();
}
This code relies on a getMAC() function. I had originally missed this from the post. Thanks to Akshay for pointing that out, and to Mike Kranidis for pointing me to sprintf(), which is supported on the ESP.
String getMAC()
{
  uint8_t mac[6];
  char result[14];

 snprintf( result, sizeof( result ), "%02x%02x%02x%02x%02x%02x", mac[ 0 ], mac[ 1 ], mac[ 2 ], mac[ 3 ], mac[ 4 ], mac[ 5 ] );

  return String( result );
}
Providing current firmware version number
It is quite useful to know which firmware version is currently running on each device. This is typically shown on a web page provided by a built-in web server on the ESP8266 device, or by debug output on the serial port. But how about when you are dealing with battery powered devices which spend the vast majority of their time in deep sleep? There would be no serial or WiFi connection up and running for you to check the firmware version.
As my devices already use MQTT to transmit their sensor readings to a central server, I just define an additional channel for the firmware version. (This code assumes you have already configured and connected your MQTT connection)
Adafruit_MQTT_Publish publish_version = Adafruit_MQTT_Publish( &mqtt, MQTT_USERNAME "/feeds/" MQTT_NAME "/fw_version", MQTT_QOS_0, 1 );


 publish_version.publish( FW_VERSION );
The last parameter to the publisher constructor above is a flag to tell MQTT the message should be retained. For more details, see one of my earlier posts on how to add this functionality.
Future improvements
There are areas that can be improved in the update process I have described.
HTTPS support will help in keeping the firmware images encrypted in transit and also reduce the risk of compromised firmware images being provided by someone intercepting the traffic between your ESP8266 device and the firmware server.
A smarter firmware server can also be built to avoid the need for a separate version file. However, while this simplifies the code on the device a bit, it also adds quite a bit to the complexity of the server side.
References
A description of the OTA process can be found at http://esp8266.github.io/Arduino/versions/2.0.0/doc/ota_updates/ota_updates.html This page also describes other ways of updating the firmware, including on-demand.
tried to upload the code its showing
httpup_datenew:11: error: ‘getMAC’ was not declared in this scope
String mac = getMAC();
^
exit status 1
‘getMAC’ was not declared in this scope
Sorry about that, and thanks for pointing it out.
I have updated the post to include the missing function.
Dear Sir,
I tested your implementation and I found it very well documented.
I have only a problem tho. In my esp8266 the MAC address contains one zero ( 0 ) digit. Your conversion function getMAC throw out a digit if it is starting with zero. Example if you have in your MAC 0f32 ( I know that this is not a valid MAC address, just I express the problem ) then your function transfer this as f32 ( loosing the trailing zero ). What do you think as solution?
Thanks and Best Regards,
Mike Kranidis
Very good point.
Leading zeros could happen at any point in the MAC number, so I’ll try to find the best solution once I’m back from work, then update the post as necessary.
The easiest option would probably be to check if the byte is less than 16, and if so, add a ‘0’ character to the beginning of the converted byte.
Something like:
if ( mac[ i ] < 16 )

{

  result += "0";

  result += String( mac[ i ], 16 );

}

else

{

  result += String( mac[ i ], 16 );

}
Well this is a very fast reply describing what I did:
void checkForUpdates() {
uint8_t mac[6];
char macAddr[14];
WiFi.macAddress( mac );
///sprintf(macAddr,”%02x%02x%02x%02x%02x%02x”, mac[0], mac[1], mac[2], mac[3], mac[4], mac[5]); /// small letters at MAC address
sprintf(macAddr, “%02X%02X%02X%02X%02X%02X”, mac[0], mac[1], mac[2], mac[3], mac[4], mac[5]); /// capital letters at MAC address
Serial.println(macAddr);
String fwURL = String( fwUrlBase );
…. your code continuous here ….
@ebakke
Dear Sir,
do you have any comment regarding my little code above?
Thanks and Best Regards,
Mike Kranidis
Sorry for the delay, work and fun is a fine juggling act at times 🙂
I mostly agree with the use of sprintf(), except I’d use snprintf() instead, to avoid buffer overflows in case of unexpected data.
In this case, there’s a tight control of the input data, as the MAC address is known to be of uint8_t type, so sprintf() should be just as good.
The reason I didn’t think of sprintf()/snprintf() when I wrote this is that this was not supported on the ESP8266 core when I first started writing for it. Old habits are hard to break, but your suggestion is easier to read and understand. I have updated the post accordingly.
I have run it through a couple of update cycles and it appears to work well.
@ebakke
it is all fine now. Again thanks for your very good work regarding the HTTP OTA.
Best Regards,
Mike Kranidis
Indeed, very good work!
Good that I found your post. It will be much more easier for me to implement such structure in a web server.
Thanks,
Luciano Colin