

The ESP8266 is a brilliant little chip, one I am using for a lot of network connected devices such as weather stations, lighting controllers, environment monitors, etc.
For a lot of these, it is important to be able to run for extended periods on batteries. Several will be in places where there is no power connections, and I don’t want to run around changing batteries all the time.
After experimenting for a while, I had a weather station which could operate for 3 weeks on 4 AAA batteries. Not too bad, considering the device had WiFi connectivity and would transmit the current readings back to my server every 5 minutes. However, it is possible to achieve much better results than this.
Experiments setup
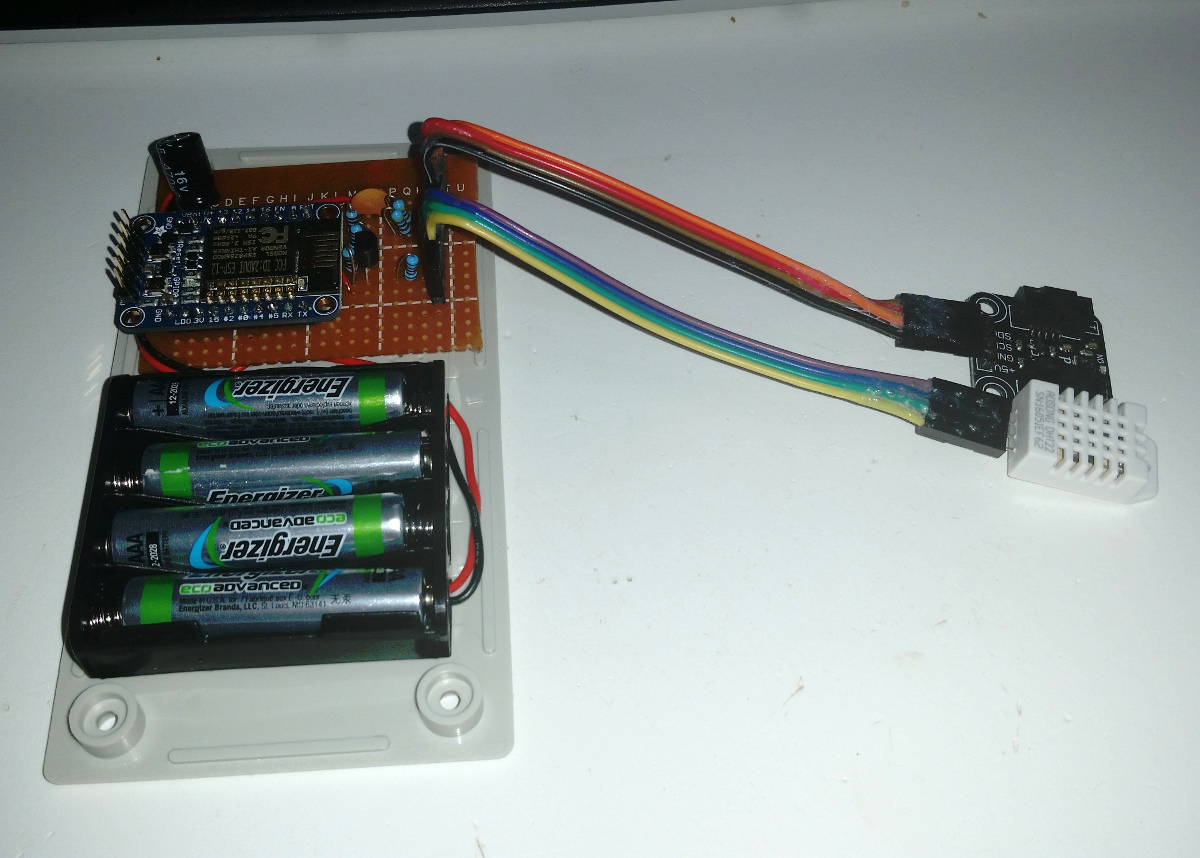
First, I built a copy of the weather monitor on a breadboard. It doesn’t look pretty, but it allows easy reconfiguration, recalibration of voltage dividers, capacitors, etc.
To measure the current going into the board, I use an Adafruit INA219 breakout board connected to a Duinotech (local brand sold by Jaycar) Nano, an Arduino Nano compatible. The Nano is loaded with a sketch which sends the current timestamp and the current reading to a PC. It has a built in USB interface, making for an easy connection.
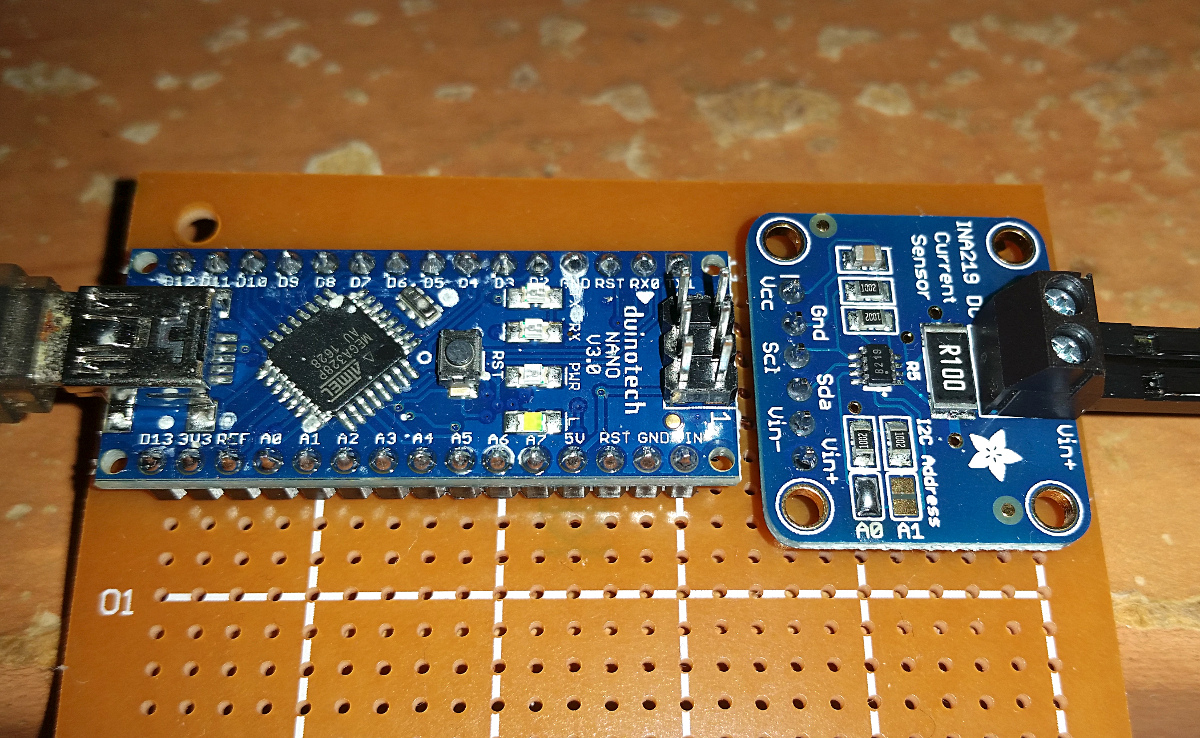
As manufactured, the INA219 breakout board has a resolution of 0.1mA, i.e. 100μA. Not good enough to get high precision measurements of deep-sleep current, but by averaging over a longer period to get an estimate I have calculated 103μA. I see others have got their chips down even lower, but as I need the voltage regulator on my boards, I can’t desolder it so will have to live with a bit higher sleep current. That said, a hair over 0.1mA isn’t anything I will lose sleep over.
My voltage divider is based on 18KΩ and 100KΩ resistors, so at a nominal 5V supply voltage there will be a leakage current of 42 μA going through it. That’s 40% of the sleep current, so I may be able to gain some efficiency there. However, I’ll need to get another INA219 that I can modify by replacing the shunt resistor before I can reliably measure such low currents.
Original version
The original version of this device was a rather naive implementation. The device would read the DHT22 and BMP180, read the battery voltage, connect to a WiFi network dedicated for these devices, send the readings over MQTT and then go to sleep for 5 minutes.
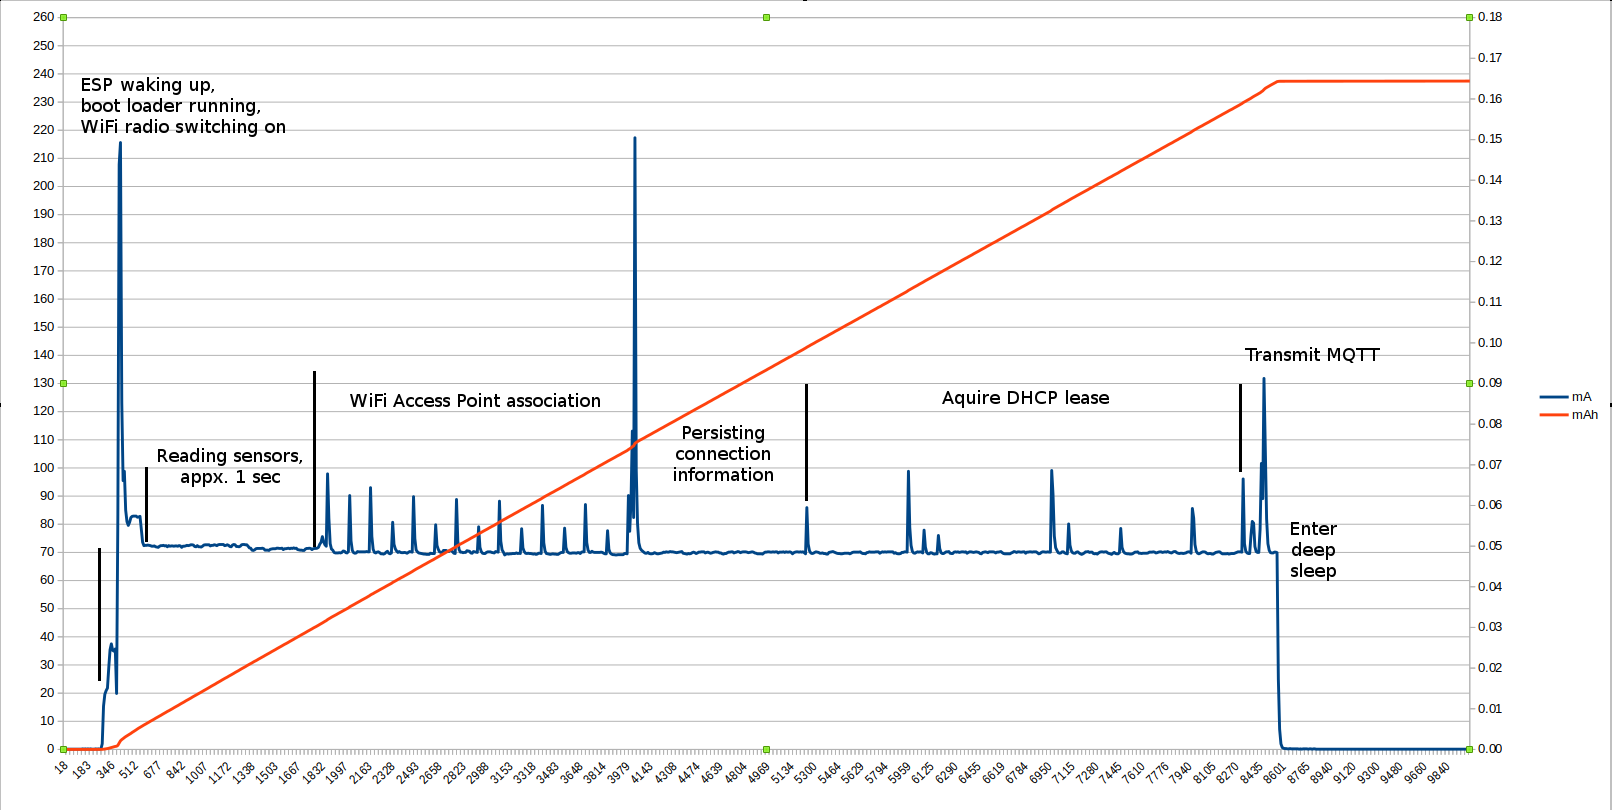
We see that the WiFi radio switches on as soon as the ESP wakes up. The boot loader runs for about 0.35 seconds, after which it hands over control to the weather monitor sketch. This reads the voltage from a voltage divider, temperature and humidity from the DHT22, temperature and pressure from the BMP180. This process takes about 1.2 seconds, the majority of which is spent waiting for the DHT22 to stabilise. The data sheet specifies 1 second from power is applied until the first reading can be made.
The next 2.3 seconds are spent connecting to the WiFi access point. This is just establishing an association with the AP, there’s no DHCP or other traffic yet.
Next comes 1.2 seconds of nothing at all happening. Interestingly, this period would be far longer in some cases, ending with the ESP crashing and rebooting with an exception 29. Online research pointed to the Espressif SDK persisting the connection information to flash memory, and something was going wrong somewhere in either the SDK or the ESP8266 Arduino core. Not sure what, but I was at least able to put the 1.2 seconds down to persisting of the connection information.
Next is DHCP traffic. This is how long it took before DHCP packets started appearing in the traffic analyser. The time taken to aquire a DHCP lease varied greatly, but on average it would take about 3 seconds.
The final power peak is the transmission of the sensor readings over MQTT, before the code sends the ESP into deep sleep.
From the graph we can see that each time the device wakes up, we spend about 1.5 seconds doing useful work (reading sensors 1.2 seconds, transmitting results 0.3 seconds), out of a total 8.3 seconds the device was awake. The red line shows the accumulated power consumption, rising steadily to a total of 0.164mAh per reporting cycle.
Over the next few posts, I’ll show step by step how I got this down to less than half. I’m splitting up the post so I can explain the individual steps in more detail. Next time, switching the radio off.